

**Prepare to see the worst paint condition you've ever seen on a miata. Just fair warning. Yes I’ll be getting it painted soon. **
I decided there's no time like the present to start doing what I've been dreaming of: time attack in Miata Challenge. Car stays street legal, and I drive it a lot, so there's still a need to balance track needs with street needs, but the car needed a few things to be properly ready for track abuse.
First off, needed a more serious driver's seat. Found a great deal on CL for a Sparco Circuit (FIA) with normal wear and tear. Mounting involved bolting the sidemount brackets to a modified Corbeau bracket, fixed position, no slider. This seat is a pain in the a** to fit due to the dimensions at the top, especially with a soft top, but I made it happen:
![Image]()
![Image]()
![Image]()
![Image]()
This made it possible to move my old driver’s seat – a Momo Start – to the passenger side for instructors. The Sparco is crazy tight and rigid, I literally feel bolted into the car in it, which is pretty cool. I paired a quick release hub with my NRG steering wheel about a year ago, never really used the quick release much, but now I am really relieved that I have it - getting in/out over the high sides of the Sparco Circuit is nearly impossible with the steering wheel in place.
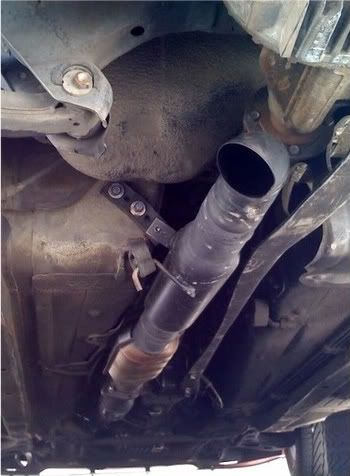
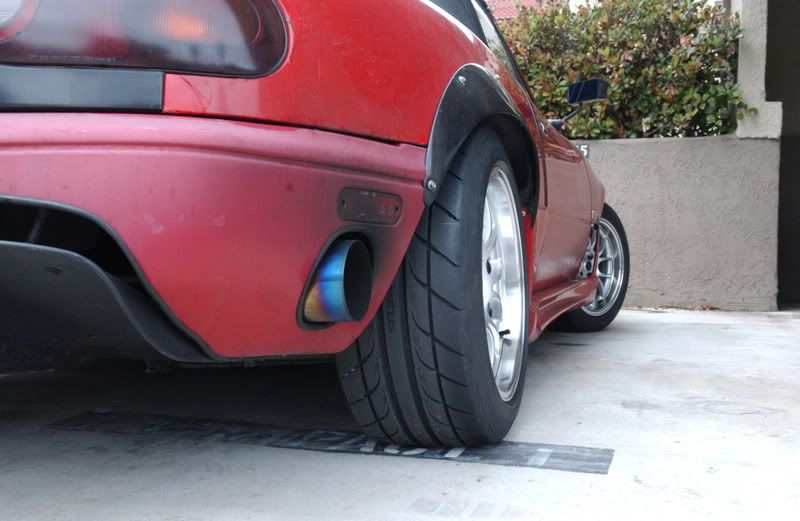
Next was the exhaust. My old setup was a 3” dump at the rear axle. It simply wouldn’t have any hope of passing sound at Laguna Seca. I had the turn down tip cut off and 3” mandrel pipe ran out to the back above the diffuser, exiting out the side of the rear bumper behind the wheel. The muffler has a removable silencer, which will be crucial for tracks with sound limits.
Old Exhaust:
![Image]()
New Exhaust (will get to the wheels in a minute):
![Image]()
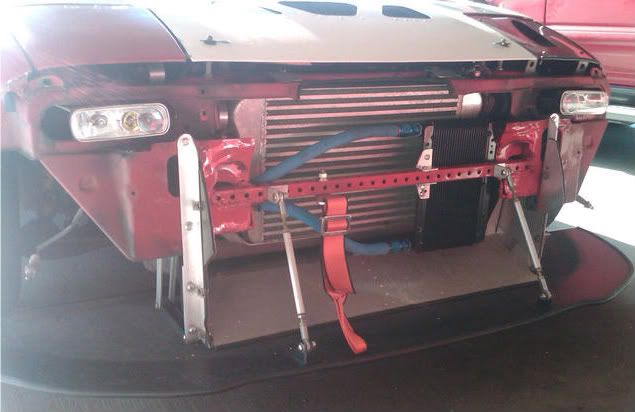
Oil cooler is basically a necessity for a turbo motor on the track. Mocal thermostat plate, FM sandwich plate spacer, push-lock fittings, aeroquip hose, Trucool oil cooler. While I was in there I added the tow strap from Saferacer. Still need to add a tow strap for the rear. Just took one quick crappy phone pic before putting the nose back on:
![Image]()
Bumper on, tow strap hanging out:
![Image]()
Found a guy on this forum who offered to trade me his Torsen for my Open diff + cash, so I scored a Torsen for $300. Along with that I got to swap my line for his SS brake and clutch lines for $50. Drove up to his place in Irvine and swapped it all on the side of the road:
![Image]()
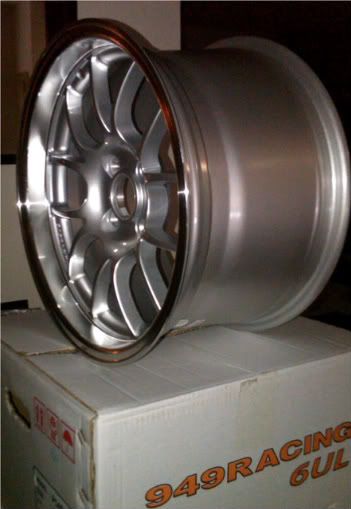
The big purchase was wheels and tires. Need a dedicated set for tracking (already have a street set and a autox set), and was tossing between the TR wheel or other cheap 15x8s, and then came across an amazing deal on CL for brand new, still in the box 15x9 6ULs for $600 with all eight 949 valve stems included. Could not pass it up. Paired them with Hankook RS-3's in the tried and true 225-45-15.
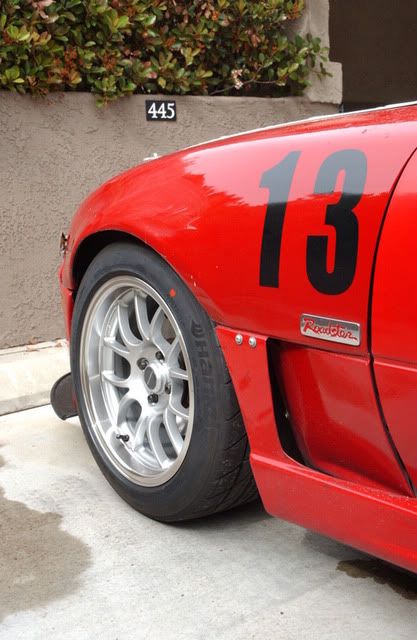
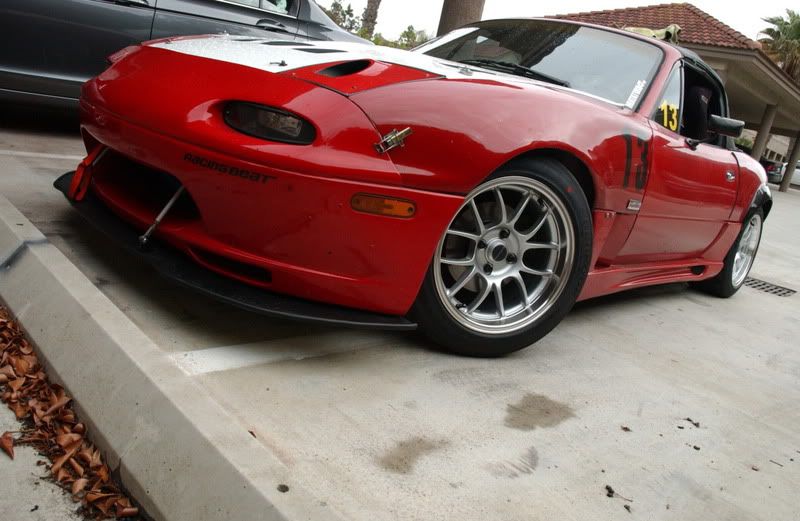
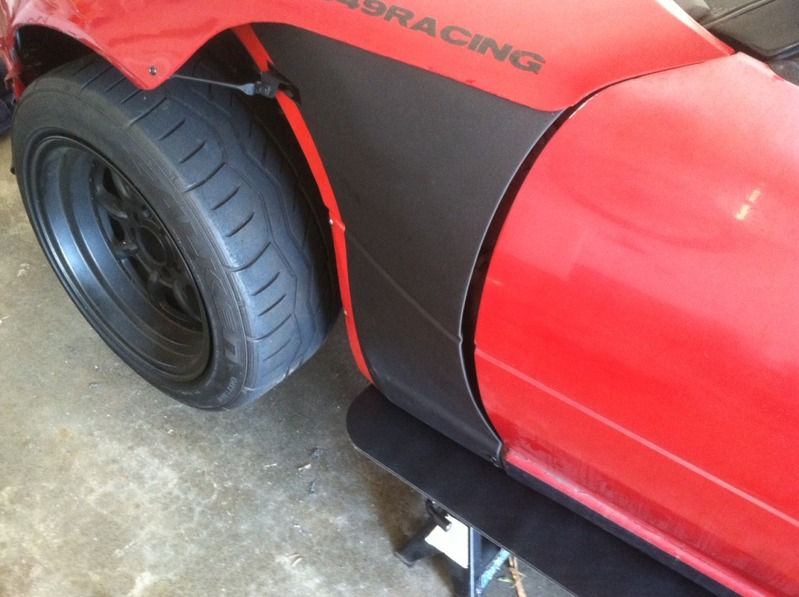
My rear fenders are flared and the front fenders are extremely pulled to fit my autox and street wheels. The result is whereast these 15x9's barely fit on most NAs, they actually look sunken in on my car, but that is great for aero, aesthetics aren't the priority here:
![Image]()
![Image]()
![Image]()
![Image]()
These are seriously meaty. Grip is ridonculous for a street tire. They make my Azenis feel like all seasons.
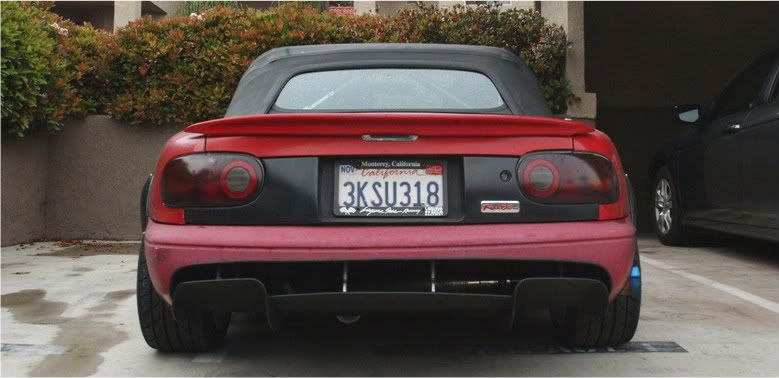
Rear view with the top up:
![Image]()
Rear View, top down (I'll be running top down for MC - I'm maxed on points for Mod class, so hardtop is not an option, plus I prefer this for the fun factor) :
![Image]()
Last, attended a dyno day to do a little check up on the motor and make sure it's still strong. I also set up an in-car switch for high-boost and low-boost. I'll be running the low boost on track for engine longevity and maximum fun.
Almost two years ago I dyno'd at 206 whp / 179 ft-lbs. Boost hasn't been changed (10psi), but better exhaust now and new plugs/wires/PCV/etc. Put down 207 whp / 208 ft-lbs. Strong.
As for the low boost for track, I'm having trouble getting the turbo to spool at any lower than 7psi. I was hoping for 4.5-5 psi and ~150 whp, I'm not sure if the exhaust is too free-flowing, or what, but with the wastegate full loose it still holds at 7 psi, which put down 185 whp / 180 ft-lbs.
![Image]()
That's about it. Car is pretty much ready to go for April 17th at Buttonwillow. Still need a tow strap on the rear, and I have to pull the rear diffuser off in order to fit under the 15.5 point limit for Mod class. I'd also like to try to get the low boost setting a bit lower.
-Ryan
I decided there's no time like the present to start doing what I've been dreaming of: time attack in Miata Challenge. Car stays street legal, and I drive it a lot, so there's still a need to balance track needs with street needs, but the car needed a few things to be properly ready for track abuse.
First off, needed a more serious driver's seat. Found a great deal on CL for a Sparco Circuit (FIA) with normal wear and tear. Mounting involved bolting the sidemount brackets to a modified Corbeau bracket, fixed position, no slider. This seat is a pain in the a** to fit due to the dimensions at the top, especially with a soft top, but I made it happen:
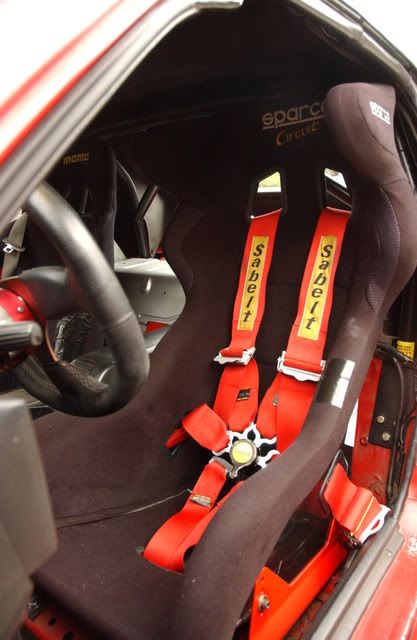
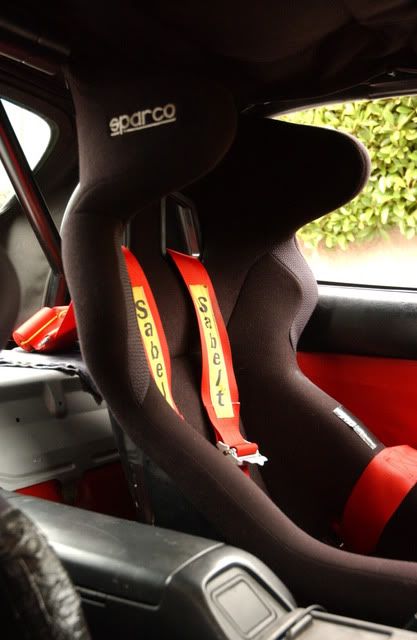
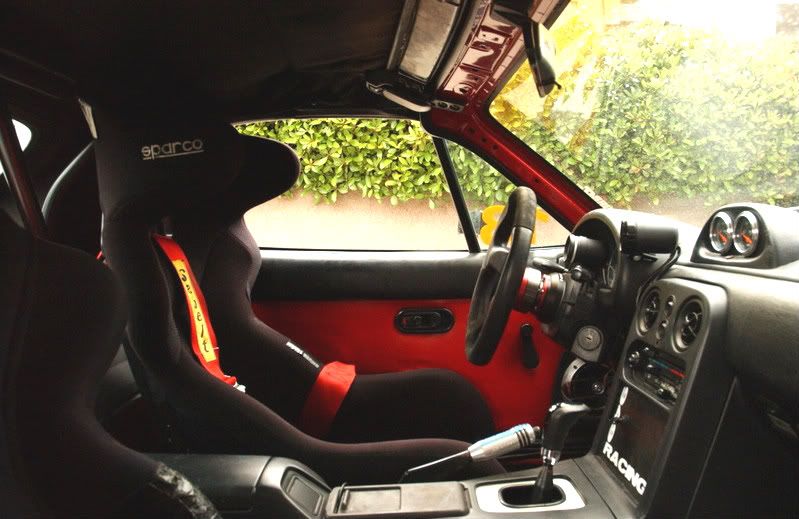
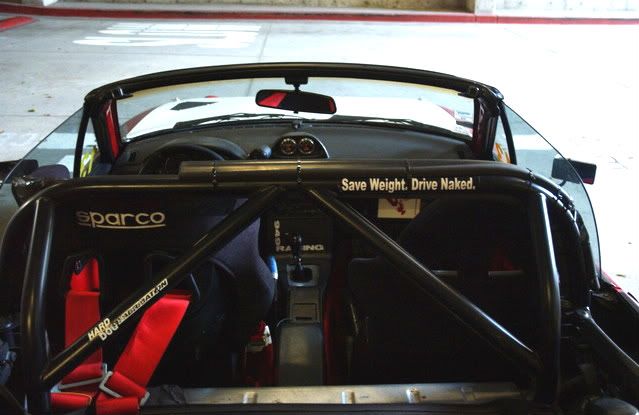
This made it possible to move my old driver’s seat – a Momo Start – to the passenger side for instructors. The Sparco is crazy tight and rigid, I literally feel bolted into the car in it, which is pretty cool. I paired a quick release hub with my NRG steering wheel about a year ago, never really used the quick release much, but now I am really relieved that I have it - getting in/out over the high sides of the Sparco Circuit is nearly impossible with the steering wheel in place.
Next was the exhaust. My old setup was a 3” dump at the rear axle. It simply wouldn’t have any hope of passing sound at Laguna Seca. I had the turn down tip cut off and 3” mandrel pipe ran out to the back above the diffuser, exiting out the side of the rear bumper behind the wheel. The muffler has a removable silencer, which will be crucial for tracks with sound limits.
Old Exhaust:
New Exhaust (will get to the wheels in a minute):
Oil cooler is basically a necessity for a turbo motor on the track. Mocal thermostat plate, FM sandwich plate spacer, push-lock fittings, aeroquip hose, Trucool oil cooler. While I was in there I added the tow strap from Saferacer. Still need to add a tow strap for the rear. Just took one quick crappy phone pic before putting the nose back on:
Bumper on, tow strap hanging out:

Found a guy on this forum who offered to trade me his Torsen for my Open diff + cash, so I scored a Torsen for $300. Along with that I got to swap my line for his SS brake and clutch lines for $50. Drove up to his place in Irvine and swapped it all on the side of the road:
The big purchase was wheels and tires. Need a dedicated set for tracking (already have a street set and a autox set), and was tossing between the TR wheel or other cheap 15x8s, and then came across an amazing deal on CL for brand new, still in the box 15x9 6ULs for $600 with all eight 949 valve stems included. Could not pass it up. Paired them with Hankook RS-3's in the tried and true 225-45-15.
My rear fenders are flared and the front fenders are extremely pulled to fit my autox and street wheels. The result is whereast these 15x9's barely fit on most NAs, they actually look sunken in on my car, but that is great for aero, aesthetics aren't the priority here:

These are seriously meaty. Grip is ridonculous for a street tire. They make my Azenis feel like all seasons.
Rear view with the top up:
Rear View, top down (I'll be running top down for MC - I'm maxed on points for Mod class, so hardtop is not an option, plus I prefer this for the fun factor) :

Last, attended a dyno day to do a little check up on the motor and make sure it's still strong. I also set up an in-car switch for high-boost and low-boost. I'll be running the low boost on track for engine longevity and maximum fun.
Almost two years ago I dyno'd at 206 whp / 179 ft-lbs. Boost hasn't been changed (10psi), but better exhaust now and new plugs/wires/PCV/etc. Put down 207 whp / 208 ft-lbs. Strong.
As for the low boost for track, I'm having trouble getting the turbo to spool at any lower than 7psi. I was hoping for 4.5-5 psi and ~150 whp, I'm not sure if the exhaust is too free-flowing, or what, but with the wastegate full loose it still holds at 7 psi, which put down 185 whp / 180 ft-lbs.

That's about it. Car is pretty much ready to go for April 17th at Buttonwillow. Still need a tow strap on the rear, and I have to pull the rear diffuser off in order to fit under the 15.5 point limit for Mod class. I'd also like to try to get the low boost setting a bit lower.
-Ryan


")


